|
|
|
Cary Clark / FAQ / Trains / all |
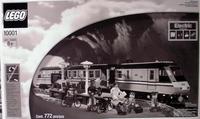
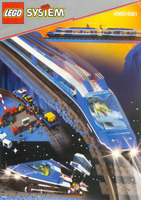
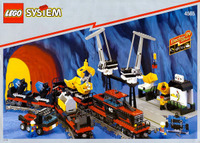
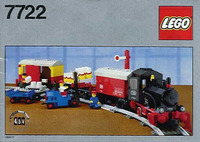
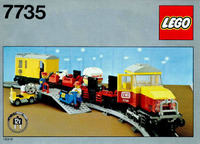
| LEGO makes trains? Where can I get them? From Cary Clark: LEGO has been making trains for over 30 years. The 9V train sets pictured below are currently available from LEGO Shop At Home. The 4561 is also available at many US toy stores. Train accessories such as extra track are only available in the US through Shop At Home.
Additional LEGO train engines and cars are available separately from Shop At Home. From Reinhard “Ben” Beneke: ! Many LEGO train enthusiasts prefer 12V, even though the sets are no longer in production. The older sets can still be acquired at a reasonable cost through outlets like eBay, especially in Germany. The German eBay site has a separate catagory for LEGO trains, and some sellers will ship internationally. From Frank Buiting: ! In most European countries, LEGO trains have always been easily available in toy stores. I’m new to LEGO trains. Should I choose 12 or 9 volt? From Reinhard “Ben” Beneke: !
I’d recommend 9V if the train is for a child, or if the track must be disassembled frequently. Adult train enthusiasts may prefer 12V, especially if they are starting from an existing 12V layout. Modern trains from LEGO S@H will run fine on 12V track by switching the motors. One may use 12V and be happy with it, if there is an existing 12V layout as a start. 9V waggons run fine on 12V track and engines can be adapted in both ways by exchange of the motors. Will the current 9V trains soon become obsolete? From Larry Pieniazek: ! All LEGO trains, including 4.5V, 12V, and 9V, use the same gauge. This has remained unchanged for over 30 years. It’s unlikely to change soon. From Matthew Bates: ! The 12V system was an afterthought to the original 4.5V battery trains and was not terribly reliable. LEGO introduced more flexible 9V components in the late 80’s. By converting trains over to this system they made all their electrical elements interchangeable. Are 4.5V, 9V and 12V trains compatible? From Larry Pieniazek: ! From Josha Delahunty: !
9V trains replaced both 4.5V and 12V trains, and replaced the plastic rails with conducting metal rails, starting in 1991. From Thomas Main: ! The track gauge is the same for all three; even the motors are approximately the same size. 12V has the advantage of neat accessories like remote stop signals and remote switch track. 9V has the advantages of being more reliable and currently in production. From Dan Parker: ! The newer, 9v wheels (on both wheelsets and on the motor) are narrower than their 4.5v counterparts. They tend to derail when negotiating 4.5V/12V points (switching rails). From Christopher Masi: ! Reinhard “Ben” Beneke has put together a history of LEGO motors, including how to convert a 9V motor to run on 12V track. To run a 12V train on 9V track, the motor must be replaced. 9V motors are available through Shop At Home. The 9V wheels roll better than the 12V ones, so they will also need to be replaced for cars to move with the least resistance. Where can I get an original Metroliner, or another older train? From Cary Clark: ! Older trains are highly valued and hard to find. Try posting a request in lugnet.market.buy-sell-trade. Older trains are often available on eBay, and may be offered on BrickBay from time to time. What are points? -or- Where can I find train jargon explained? From Larry Pieniazek: ! Points are the rails in a turnout that move. You’ll find an extensive train glossary here: http://my.voyager.net/lar/gloss.html From Cary Clark: Here’s another good train glossary: http://pavel.physics.sunysb.edu/RR/RailroadDefinitions.html From Jeff Christner: ! On the railroad that I work for (Norfolk Southern), one refers to the points of a switch, as in “Make sure there is nothing fouling the points before you throw the switch” in case something is preventing the points from moving freely. The points are the parts that move, the switch is thrown, and the turnout is the whole assembly. I’ve never heard it called a turnout at work; the yard dispatchers always call them switches. What’s a rack railway? From Larry Pieniazek: ! Rack railways are also called cog railways. In addition to the two weight bearing rails there is a central toothed rack that a cog on the power car engages. When the limits of adhesion are reached during the ascent (typically around 5% grade or so) the cog engages and powers the ascent. Similarly on descent, the cog takes the primary braking load. Where are some good general train websites? From Mark de Kock: ! Try the NGLTC’s Train Depot. It’s great! http://www.ngltc.org/train_depot/ From Larry Pieniazek: ! Here are some other good ones: http://www.pnltc.org/ http://my.voyager.net/lar/lego.html James Mathis’ Brickshelf images http://www.geocities.com/SoHo/Lofts/9639/trains.html From Cary Clark: And a few more: http://www.baylug.org/train/ http://users.rcn.com/cjmasi/lego/ http://www.lightlink.com/demlow/trains/ What are good references for creating engines and stock? From Larry Pieniazek: ! The Walthers 2000 Big Trains Reference Book or the Walthers 2001 HO Scale Model Railroad Reference Book are good sources. They’re available directly from Walthers and are often stocked by your local hobby shop. The magazines Model Railroader and TRAINS have loads of ideas. These US prototype lines have websites: Burlington Northern Santa Fe Railway, ConRail, Norfolk Southern. Then there’s the National Model Railroad Association site. Also, try news:rec.model.railroad for sources from other model railroaders. From Robin Werner: ! More ConRail, new and old: http://crcyc.railfan.net/locos/locomotives.html From Mark de Kock: ! This link has European Trains; there are loads of pictures of railways in Europe. http://mercurio.iet.unipi.it/pix/ From Josh Baakko: ! http://www.northeast.railfan.net/railphotos.html From Kevin Maynes: ! This one focuses on Canadian railways: http://stewart.railfan.net/rail/engines.htm From Ross Crawford: ! Here’s a site that specializes in Australian railways: http://www.railpage.org.au Where can I get details about real-life railroad operations? From Larry Pieniazek: ! www.nmra.org - National Model Railroad Association. www.kalmbach.com - Kalmbach is a leading publisher of ref material, as well as publishing the US magazines TRAINS (prototype) and Model Railroader (models). www.railfan.com - Carstens Publications, Kalmbach’s competitor. http://dir.yahoo.com/Business_and_Economy/Transportation/Trains_and_Railroads/Railway_Enthusiasts/ From Larry Pieniazek: ! Another good approach is to try to find the websites of fans that are devoted to particular lines, or to the prototype lines themselves (NS and BNSF come to mind as potential sites (http://www.bnsf.com/, http://www.conrail.com/, http://www.nscorp.com) Where can I find pictures of Maintenance of Way cars? From Bob Parker:! Maintenance of Way cars include ballast spreaders, tie cranes, flangers, spike pullers, bunk cars, and so on. Try these sources for pictures: http://www.klutts.com/inventory.html http://www.northeast.railfan.net/mow.html http://www.railroaddata.com/rrlinks/Maintenance_of_Way/ Can I run different trains using the 4519 cross track? From Jasper Janssen: ! Yes, since the cross track is electrically isolated, separate train loops can cross each other. However, a figure eight is only a single loop, and can only have one controller. So, to run trains on separate loops, you’ll need two or more cross tracks. From Zhengrong Zang: ! With Mindstorms RCX control, it is possible to run two trains without collision with a single cross track. http://legochina.virtualave.net/MOCs/RCXCrossDualLoops.html What can I do with two ovals of track? From Simon Robinson: ! If you use one of the ovals to do the ends of an oval, and use pieces from the other oval to fill in the sides in a curvy pattern, then you can do anything, as long as you put the same or mirrored arrangement in both sides of the oval. From Larry Pieniazek: ! Matthew Bate’s track designer program for Windows is an excellent resource to figure out what you can do with the track you have. You’ll find it here: http://www.ngltc.org/train_depot/td.htm What’s a good height for an overpass? From Michael Hader: ! Matthew Bates has created a good tutorial for overpasses and inclines: http://ourworld.compuserve.com/homepages/train_depot/inclines.htm From Larry Pieniazek: ! At least 13 bricks if not higher. The trick is figuring the slope of track leading up to the overpass. The track slope is limited by the horsepower-to-weight ratio. As you increase the slope, slippage also comes into play. At 3 plates per track segment you are going to have a hard time pulling even 1 or 2 cars up a grade with a single motor. A motor by itself will have a hard time at 4 plates per slope unless you add extra weight to improve adhesion. I tend to use 1 plate per slope, but I like long trains and usually budget 2 motors per locomotive. Also, allow for transitions. Do not change the rate of change in elevation by more than 1 plate per section, so to get to that monster 4 plates grade, you should be using 3 transition segments of 1, 2, and 3 plates of increase. Never change the rate of change on a curve, or on the section next to it. You can get away with two plates per section, even curved, without derailments, if you come into and exit the curve at the same grade. How steep an incline can a train climb? From Michael Hader:! Matthew Bates has written up a good tutorial for building inclines here: http://www.ngltc.org/train_depot/inclines.htm Can I run more than one track with one regulator? From Matthew Bates: ! You can attach many trains to a train controller. I’ve had 4 running without any noticeable decrease in speed. You can also attach additional non-train motors to the train controller. It’s nearly impossible to damage the train controller no matter what you do to it. The train controller has a voltage regulator in it that has built in overload protection. So if you overload it, it just shuts off. From Patrick Gili: ! The clip wire has two terminals, one for either side of the track. One clip directs current from the regulator to a load such as a train motor. The other provides the return path for the current. Without a train motor on the track, there’s no circuit completion, so no current is drawn, regardless of how many clips you attach to the regulator. When you apply a load, current is drawn from the regulator. The amount current drawn depends on the resistance of the load. The train regulator does not control current; it controls voltage. The regulator has a limit on the amount of current it can provide. A free running motor draws a constant current, independent of voltage. The motor will draw more current if a mechanical load is applied to it (e.g., the friction of running on the track, the weight of the train and its payload, and inclination). From Cary Clark: Long stretches of track provide some resistance, dropping the voltage that is available to the motor. By using more than one clip from the same regulator to different sections of track, it’s possible to keep the train running at a uniform speed. If you accidentally reverse one pair of the clips, you won’t hurt anything. The train just won’t run. You’ll notice that the light on the regulator will dim when the clips are mismatched. Can I have two controllers on one line? From Ben Fleskes: ! I recomend one controller on each loop, with a pair (or more) or switches connecting the two loops. With this sort of layout you can move your trains between loops easily. It takes a little practice to understand how the switches impact things. In summary:
I used a multimeter to discover that the voltage on the track is the larger of the two voltages that the two controllers puts out, if they have the same polarity. If they have opposite polarities, then they always short out and there’s a small residual voltage (about 0.3V) on the track. There isn’t any noticable effect on the speed of the train if you put an extra controller on the track. How do I build a reversing loop? Manfred Moolhuysen: ! Here are the plans for a reversing loop: http://ourworld.compuserve.com/homepages/train_depot/reverse2.htm It’s possible to modify this plan so that the point’s switch is not moved. The only restriction is that the train always runs through the loop in the same direction. In the original version of the reverse loop, the inside rail between the switch and the isolated section is unpowered until the point switch is moved. By eliminating the isolation tape used on the inside rail near the point, the inside rail receives current from the isolated section up to the point junction. The train easily pushes the spring-loaded points open to continue on the powered rail. Zhengrong Zang: ! I have automated my reversing loop using the Mindstorms RCX or Scout with Microscout. http://legochina.virtualave.net/MOCs/RCXReversingLoop.html What are the electrical limits of 9V trains? From Simon Robinson: ! The controller supplies a variable voltage. As you move the speed regulater from zero to the first of the 6 marks the voltage jumps up to about 3V. It then increases linearly up to about 9V for the maximum speed. The motor power unit has a resistance of 8.7 ohms, so at maximum speed, it’s using about an amp, which works out to 9 watts of power. For a typical controller, expect:
How do I make remote-controlled points (switching rails)? From Ben Fleskes: ! I use a small technic pneumatic cylinder with a modified switch track. I modified a switch track using Steve Barile’s instructions on the PNLTC web page. This change took at most five minutes and I found it very easy with an exacto knife as my only tool. After the modifcation, the switch could easily be switched from one position to the next with little resistance. To build the pneumatic switch, you will need the following parts: (1) small technic cylinder (1) 1x2x1 brick with side peg (1) gray technic connector peg (1) modified switch track Pneumatic hoses, valve and a pump.
From Christopher Masi: ! Here’s my design, which copies some features found on other automated points. http://users.rcn.com/cjmasi/lego/trains/tech/pointsmarkii/points.htm From Wessel Burgers: ! And here are the building instructions for my automated 9V points. http://www.wez.myweb.nl/points1.htm How do I convert my train to DCC? From Tom Cook: ! Digital Command Control (DCC) transmits signals through the track to trains and train accessories. It can be used to control the speed of the train, for instance. LEGO does not support DCC, but the train engine can be retrofitted with a DCC decoder. Find out more at: http://ourworld.compuserve.com/homepages/cook_thomas/Trains/DCC/dcc.htm Can I use my train with an RCX? From Larry Pieniazek: ! If you are willing to have the RCX be stationary, just connect one of the motor controls go to the track. If you have a 1.0 RCX, then you’ll be able to run it off a wall transformer. Otherwise, the RCX will have to be battery-powered. To have the RCX control the motor without powering the rails, connect the RCX to an external power source, such as a battery box, and then connect it to the top of the motor. It’s not possible to have the RCX onboard, powered by the rails, and controlling the motor, without modifying the LEGO train motor. Additionally, you’ll need a custom cable to get power from the motor to the 9V (wall transformer) input, if you have the older RCX version, or to the battery terminals if you have a 1.5 version. You can’t feed power into the RCX using a sensor connection. What scale are LEGO trains? From Irving De la Cruz: ! O-scale prints match the LEGO train scale although they might be a bit too big depending on your preference. From Tom McDonald: ! LEGO trains don’t match an established model railroad scale. The scale I would most like to operate in would be to have the trains accomodate the minifigs as much as like a real train as possible. LEGO track is six studs from rail to rail; US Standard gauge track is 4’8”. Given these and if you assume that six studs represents a scale of 4’8”, then it stands to reason that since most cars are in the 8’ wide range that six studs for car width is not enough: ten studs is a more accurate representation. I like the six stud wide trains and make them anyway. From John Neal: ! LEGO track gauge is somewhere short of G scale but bigger than S. I have experimented with making 1 foot equal 1 stud. This scale isn’t too bad- the track is a little too wide (6 studs vs 4.66 studs-4’8”), the wheels are a little too short (3 studs -36” vs typical 40-44” wheels on a modern diesel), but the minifigs are 5 studs tall (5 ft) which is okay. Should I build My Own Creation 6 wide or 8 wide? From John Neal: ! Most trains from LEGO are six studs wide. But eight stud wide cars and engines which allows for more room and better modeling. From Larry Pieniazek: ! If the length is scaled up to stay proportional to the increase in width and height, it becomes difficult to build train cars that can negotiate the tight LEGO track curve radius. Six wide trains match minfig scale better. What are my choices for building a train car base plate? From Braden Fox: ! You can build your own out of technic plates layered two thick. The bogie plate’s pin will mate with the technic plate holes. Or, put a 2x2 turntable on the wheels and avoid the bogie plate altogether. Is there a LEGO train club in my area? From Cary Clark: New train clubs pop up all the time. Check this map to see if one is in your area: http://www.lugnet.com/map/ If not, consider starting one of your own. To get organized, post to: http://news.lugnet.com/trains/org/ What’s a good size for a train club’s exhibition table? From Ben Fleskes: ! If the table dimensions are multiples of 30.25 inches, then they can be covered with nine 32 stud by 32 stud green baseplates, or four 48 stud by 48 stud grey baseplates. At a minimum, I suggest 30.25” by 60.5” for long linear runs. For extra depth, stack them two deep. From John Neal: ! At GMLTC, we use about a 30” by 45” table, equal to exactly 6 large gray baseplates. Why do some train clubs build up the table top by 20 bricks? From Larry Pieniazek: ! Some train clubs, like PNLTC, have tables. They put their tables together and they build the layout by putting track together and placing buildings on a brown or green colored table. This makes for a highly flexible layout, but it may take a long time to set up and tear down. Other clubs like GMLTC have modules. Each module is a complete and the track is attached to the LEGO below. GMLTC modules are more like model railroad modules in that they are pre-built. This makes for a fairly rigid layout that is fast to set up. The modules are 15 or more bricks high to be strong enough to be lifted up, flipped over, stacked on top of each other, and so on. The height also allows features like subways and bridges built in at track level. How do I make a four car monorail train? From Larry Pieniazek: ! James Mathis for a three car monorail done in a very clever way with springs and the technic link. http://www.brickshelf.com/cgi-bin/gallery.cgi?f=1631 From Tim Courtney: ! If you take the wheels off the bottoms, you can plug them into technic plates with holes in the middles of them. Get a lot of wheels and make your own car connectors. Hook your monorail cars together with ball and socket connectors and use normal plates and make your own. From Cary Clark: ! Here’s a four car monorail modeled after the Airport Shuttle that uses ball and socket connectors: http://www.brickshelf.com/cgi-bin/gallery.cgi?i=16055 How can I build a water tower? From Larry Pieniazek: ! Try the 4x4 quarter round bricks, or build an octagonal one (prototypical) use the 2x2/1x4 plate hinges, or build a square one (also prototypical). From Mike Nickel: ! How about the oversize barrels that come with many wild west sets? From Thomas Cook: ! Some pictures of my water tower can be found at: http://ourworld.compuserve.com/homepages/cook_thomas/Trains/Structures/WaterTower/WaterTower.htm How do I make a 2-man handcar? From Ben Fleskes: ! For an idea, look at the one that comes with the LEGO Loco CDROM. Or as an alternate, I built one similar but changed most of what was above the 4x6 plate. It works something like this: One top of the 4x6 plate with small train wheels, put two 1x2 tiles w/ center stud on top on either side of the 4x6 plate. Place one 1x1x1 technic beams on top of each 1x2 tile with center stud. use a 2x2x1/3 with technic peg holes underneath and use technic pegs to connect it to the 1x1x2 technic beams. Then use two 1x2x1/3 ‘space lasers’ (they have thin rods sticking out either side for a distance of almost two studs) on top of the 2x2x1/3 plate mentioned above. Place the ‘space lasers’ such that they point to the sides, not front to back. From Russell Clark: ! I usually refer to it as a gandy dancer. There are also instructions to build one in the 7777 Train Idea Book: http://www.brickshelf.com/scans/7000/7777/7777-03.jpg Why is the 4551 called a crocodile? From Brian Williams: ! LEGO set #4551 bears a striking resemblance to the Austrian Federal Railways class 1020 electric locomotive. Märklin produced a now out-of-production miniature bearing the paint scheme. The prototype was more orange than red.  Forty seven of the class 1020 operated in Austria after 1945. These locomotives were manufactured in Germany as the popular class E94 before the war for the most part (later reclassified by the Deutsch Bundesbahn in Germany as DB class 194). The E94 possessed features similar to the popular Swiss class Be 6/8III in that it was powerful, articulated and had two coupled power trucks with a cab in between. The Swiss Be 6/8III was nicknamed “crocodile” because the long, dark green hoods covering it’s power trucks were reminiscent of a crocodile. Because of the similarities between the locomotives, the German class E94 became known as the “German Crocodile.” For more information on the prototype visit http://www.bockholt-lokomotiven.de/en/mod/sbb_ce68ii.html. Later, the Lego “class” 4551 retained the nickname “crocodile” although the published set name varied by country. The United States S@H called it “Trolley Locomotive”. What can I use for spare tires for 4.5V or 12V engines? From Peter Simpson: ! Old 4.5V and 12V trains use rubber bands around the wheels for traction between the train motor and track. As they age, the original bands dry out and crack, becoming useless. A much more durable substitute is heat-shrink cable sleeving. The sleeving is cut to size, put over the tire, and then heated gently to fit. Be careful not to heat your LEGO too much -- it will deform and melt. From Reinhard “Ben” Beneke: ! I got this tip from Pascal Breard of France. I have not tested it myself. Cut a bicycle’s inner tube (the smaller one for a racing bike) into 4 mm sections. It works well, it’s cheap and lasts longer than the original LEGO tyres. Here’s the brand I use: Hutchinson 700x18-20-23 VF 53mm How can I make custom stickers? From Brian Williams: ! Most inkjet and laser printers can print on transparent labels, but few color printers can print white. Alps printers http://www.alpsusa.com/ are dye sublimation printers that print CMYK along with opaque white and metallic inks. The inks can be layered so that portions of the artwork (a logo for instance) can be underprinted with white. Also, colors can be enhanced with metalic silver and gold. What’s the difference between LEGO’s buffers and US couplers? From John Neal: ! The LEGO design combines the buffer and the coupler. US train trucks do not have buffers. In fact, one way to convert the LEGO design is to cut the buffers off. From Ben Fleskes: !
|
|
Primary content in this document is © Cary Clark. All other text, images, or trademarks in this document are the intellectual property of their respective owners. |
| |
©2005 LUGNET. All rights reserved. - hosted by steinbruch.info GbR |

