|
|
| |
In lugnet.build.schleim, Larry Pieniazek wrote:
| |
Deeplinks, Brother John, Deeplinks!
|
Gahh! Well, they have been moderated now. Enjoy.
JOHN
|
|
| |
In lugnet.build.schleim, John Neal wrote:
Deeplinks, Brother John, Deeplinks!
|
|
| |
In lugnet.announce.moc, Ross Crawford wrote:
| |
Click pic for the answer...

ROSCO
|
Awesome, Rosco! When I clicked, I didn’t expect it to be able to be tuned to
pitch!
Well played;-)
JOHN
|
|
| |
In lugnet.announce.moc, Ross Crawford wrote:
| |
Click pic for the answer...
ROSCO
|
This is cool, but you already know that, since I already told you how awesome it
is. Of course, the only thing that would make it cooler was if it was going to
be displayed at Brickfete.
Janey “Yes, I used Rosco for a shameless plug, Red Brick”
Ok, more seriously, its an impressive build, has nice lines, and sounds pretty
good as well. No more cranes and bridges for you.
|
|
| |
Click pic for the answer...
ROSCO
|
|
| |
In lugnet.build.schleim, Didier Enjary wrote:
| |
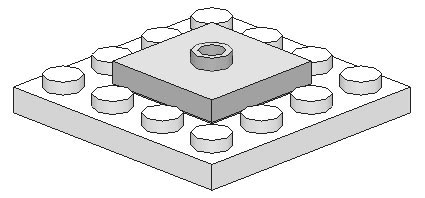
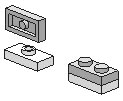
The news has already been commented in many places - the LEGO board games to
come (2009-2010) are bringing to us some new parts.
Among them, a 2x2 plate with one - centered - stud. Some will call it the
super jumper plate. I prefer the german acronym AVMEP, coined on the former
AZMEP (jumper plate). The “Z” (Zwei - Two) is replaced by the “V” (Vier -
Four)
|
snip>
| |
So, do you like AVMEP part and AVMEP buildings?
|
I have been thinking for a long time about half-stud offsets in two directions
going around corners of buildings so as to quoin the bricks. Perhaps this piece
could facilitate that.
|
|
| |
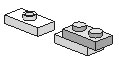
The news has already been commented in many places - the LEGO board games to
come (2009-2010) are bringing to us some new parts.
Among them, a 2x2 plate with one - centered - stud. Some will call it the super
jumper plate. I prefer the german acronym AVMEP, coined on the former AZMEP
(jumper plate). The “Z” (Zwei - Two) is replaced by the “V” (Vier - Four)
I see three simples AVMEP buildings
- stacking a jumper plate onto two others - an obvious build but two plates thick,
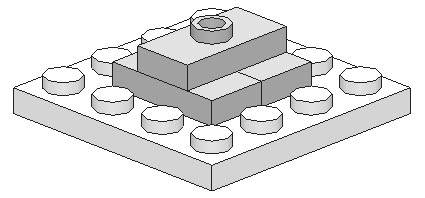
- place a 1x1 round plate between four studs - it saves parts, is one plate thick but that’s not so easy to stack a round plate this way,
- and the last one is based on the now famous NUT
So, do you like AVMEP part and AVMEP buildings?
|
|
| |
In lugnet.build.schleim, Didier Enjary wrote:
| |
- less clutch power for immediate disassembling
- limited jumper plate colour availability for increased building challenge
|
Which contradicts your claim of uselessness for the following reasons:
- less clutch power is sometimes desirable - I have used this exact construction in a GBC module to allow easy removal of a part for maintenance. The clutch is even less than a regular stud in a regular hole - that is, barely any.
- There are colours in which the jumper tile exists, but not the 1x2 plate (exercice left to the reader to find them; one is as recent as 2009)
So there, this is actually useful!
| |
To conclude I encourage you to share your favorite NUTs (New Useless
Technique) in reply to this post
|
Well, it may not qualify as useless either, but I’ve contemplated using 1x2
hinge bricks in a fixed, studs-up position, instead of regular 1x2 bricks. The
reason is simple: to have a smooth-looking brick, with hollow studs on top; as
you said sometimes you need that (although now you mention it, the 1x1 brick
with hole would work just as good)
|
|
| |
In lugnet.build.schleim, Didier Enjary wrote:
| |
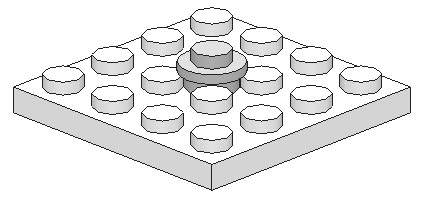
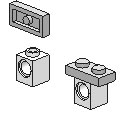
The jumper plate IS a hollow stud part. What if we combine these two
techniques? You achieve an incredible one-stud offsetand get great advantages
:
- only two plates thick,
- less clutch power for immediate disassembling
- limited jumper plate colour availability for increased building challenge
and the most amazing is that this technique has
- No SNOT side effects.
|
All humor aside, this is actually a useful technique...in one specific instance
(well, probably two, now). When you put a grille tile down on a regular plate,
the studs fill in the gaps nearly completely. When you put a grille tile down
on a jumper plate, a lot of the space between the slats remains open. It’s not
easy to tell due to the parts being black-on-black, but I actually did this very
thing twice on my Nerd Herd car from the Chuck TV series
here. You can see two
grille tiles bridging the gap between the two headlights, but the telling thing
is that you can’t really make out any studs behind them. I tried it the other
way, but with the jumper plates instead of a regular 1x4 plate it looks less
solid behind the grille.
The grilled cheese is the other part that can make use of this, but it doesn’t
have a pin in the center, so while you can put it down on a jumper plate, it
won’t stay put unless you lock it in from all four directions. Also, since it’s
already raised due to the slope, you’ll notice the difference in studs a lot
less than you will with the regular grille tile.
Ooh, actually, now that I think of it, you can also get a different look by
doing this with transparent parts, like if you want some variation in a
multi-layer wave washing up on a beach.
So, wait, now what was that about this being a useless technique again?
|
|
| |
In lugnet.build.schleim, Didier Enjary wrote:
| |
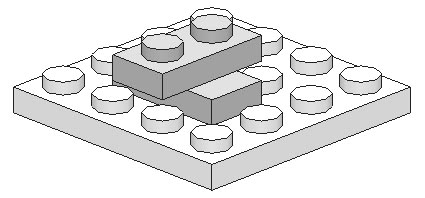
ABT (Advanced Building Techniques) are widely used. Everyone knows for
instance the use of a jumper plate to achieve a half stud offset (AZMEP)
Another one consist in stacking 1xn parts on hollow stud in a tube to hollow
stud connection.
The jumper plate IS a hollow stud part. What if we combine these two
techniques? You achieve an incredible one-stud offsetand get great advantages
:
- only two plates thick,
- less clutch power for immediate disassembling
- limited jumper plate colour availability for increased building challenge
and the most amazing is that this technique has
- No SNOT side effects.
To conclude I encourage you to share your favorite NUTs (New Useless
Technique) in reply to this post
Schleim well,
Didier
|
Nice technique, Didier, thanks for sharing. Spotlighted.
I’ll make sure to give you due credit whenever I use it.
Richie Dulin
CO Legeaux
|
|
| |
ABT (Advanced Building Techniques) are widely used. Everyone knows for instance
the use of a jumper plate to achieve a half stud offset (AZMEP)
Another one consist in stacking 1xn parts on hollow stud in a tube to hollow
stud connection.
The jumper plate IS a hollow stud part. What if we combine these two techniques?
You achieve an incredible one-stud offsetand get great advantages :
- only two plates thick,
- less clutch power for immediate disassembling
- limited jumper plate colour availability for increased building challenge
and the most amazing is that this technique has
- No SNOT side effects.
To conclude I encourage you to share your favorite NUTs (New Useless Technique)
in reply to this post
Schleim well,
Didier
|
|
| |
It’s been a while but I’m back. And now that it is officially summer, what
better way to kick things off than with a summer study- Study 24.
Not the longest or tallest bridge (H=24.5”, L=73”), it is the first to really
use schleim/SNOT not just for aesthetics but structurally too.

Study 24 is also the first bridge to use a real floater system like real bridges
do. Eight (four under each roadway) are holding it all up.

And the schleim/SNOT technique- check out all those 2x2x3 steep sloped set
upside down. (I’ll add some more pics of how I did this later.)

For more pics please check out the Flickr page (sorry- quit using BricksShelf
last year)
http://www.flickr.com/photos/74791990@N00/sets/72157620270278726/
Adr.
|
|
| |
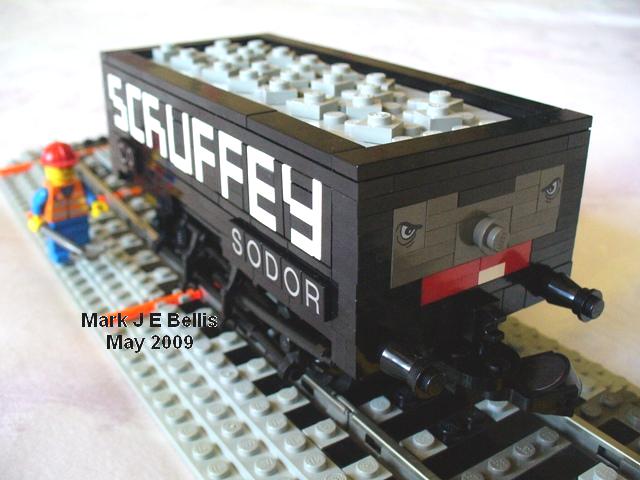
After going to a railway exhibition last Saturday (23rd May), and buying some
books, I was inspired to build some new wagons.
I added working features, such as opening doors, as well as SNOT lettering.
Most are real UK wagons but I also did the Awdry character “Scruffey”.
The new plate modified 1x2 with bar on end is quite a useful piece for
drop-sided wagons. Black droid arms are useful for supporting the tubes
underneath. The tubes represent parts of the brake gear and supports, but
working brakes might have been overkill :classic:
More technical info here:
http://www.brickshelf.com/gallery/mbellis/Trains/Wagons/New-Wagons-May-2009/2009_wagons_info.txt
There are 4 wagons, the first picture of each here:
“Scruffey”:
Grampus 12ft wheelbase drop-side wagon:
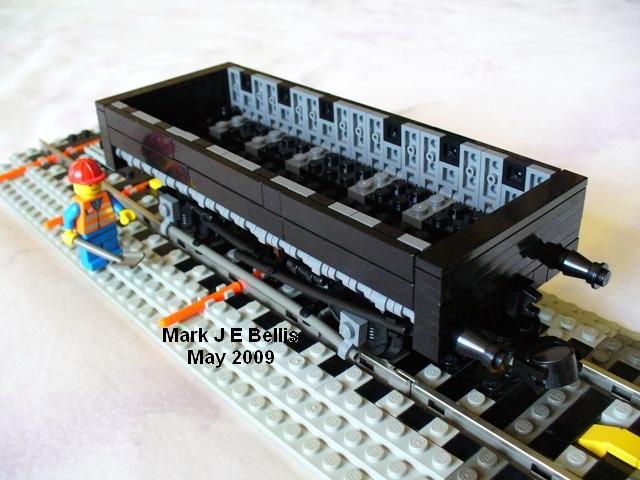
LMS 5-plank open wagon with lime load and opening side doors:
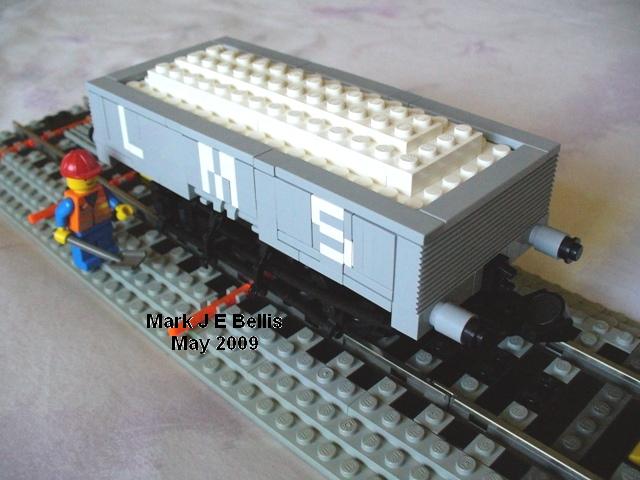
SC coal wagon with opening side and end doors:
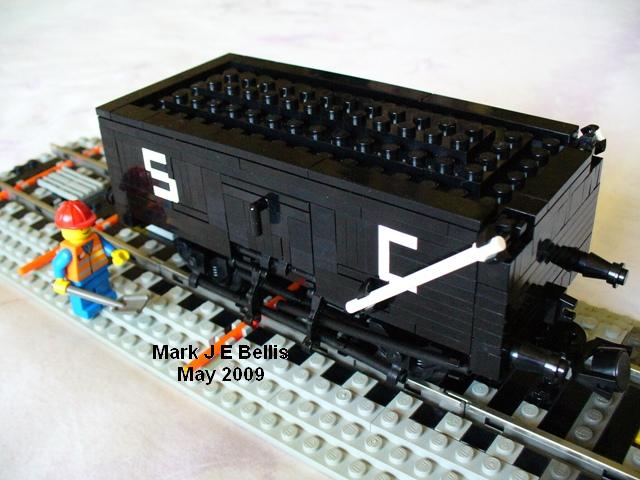
Folder when moderated: http://www.brickshelf.com/cgi-bin/gallery.cgi?f=385528
Includes some open-door and underneath pictures too.
Hope you like them.
Mark
Mark Bellis 8mm Scale LEGO Trains
http://www.brickshelf.com/cgi-bin/gallery.cgi?f=62749
|
|
| |
In lugnet.announce.moc, Erik Amzallag wrote:
| |
Hello,
The difficulty with the minifig-sized tank trucks is to get a 6-wide tank.
One of the solutions is to use 6x6 round dishes (
for instance, like
Pierre Normandin did )
I wasn’t really satisfied with this solution. The coming of the panel 3x3x6
corner in white in the #7635 set brings a new solution.
8 of them make a really nice tank.

Gallery after
moderation (or increase the number of the deeplink from
01 to
06)
The inside structure is enough strong (but probably not for a kid).
|
Love it! A gorgeous design that nicely evokes the real vehicle, and it just
plain looks great. I love the overall lines, specifically the angled front and
in the side windows.
A great little MOC!
Dave!
|
|
| |
Nice solution, looks good!
|
|
| |
In lugnet.town, Manfred Moolhuysen wrote:
| |
Nicly done, and good proportions in relation to the tank.
|
Thanks.
| |
If I spot correctly the trick of the inside structure is 2x part #60474 Plate
Round 4 x 4 with Pin Hole, that are placed back to back, joined by an axle
and 2x part #3713 Technic Bush. The cutouts on one of the rims of the Technic
Bush fit between the studs of the plate and prevent these from turning.
|
That’s correct.
| |
I might have a suggestion to improve this a bit. I think it’s possible to
strenghen the inside structure by using a longer axle, 2x part #3709b
instead of the plain 2 x 4 ones, and by replacing some of the Bricks 2 x 2
with parts #6232
|
It’s a possibility. But not sure it will strengthen the structure, as the main
issue is that the panels are only connected by the 4 top studs.
Just waiting for a 6x6 round plate now :)
Erik
|
|
| |
In lugnet.announce.moc, Erik Amzallag wrote:
[snip]
| |
I wasn’t really satisfied with this solution. The coming of the panel 3x3x6
corner in white in the #7635 set brings a new solution.
8 of them make a really nice tank.
|
[snip]
[snip]
Nicly done, and good proportions in relation to the tank.
If I spot correctly the trick of the inside structure is 2x part #60474 Plate
Round 4 x 4 with Pin Hole, that are placed back to back, joined by an axle and
2x part #3713 Technic Bush. The cutouts on one of the rims of the Technic Bush
fit between the studs of the plate and prevent these from turning.
| |
The inside structure is enough strong (but probably not for a kid).
|
I might have a suggestion to improve this a bit. I think it’s possible to
strenghen the inside structure by using a longer axle, 2x part
#3709b Technic, Plate 2 x 4 with 3 Holes
instead of the plain 2 x 4 ones, and by replacing some of the Bricks 2 x 2 with
parts #6232 Brick 2 x 2 with Pin and
Axlehole
With friendly greetings, M. Moolhuysen.
|
|
| |
The Cormorant debuted at BrickCon 08, but it’s history goes back 9 years to a
post-Mindfest build inspired by my haul from that event. I ended up with a
bunch of wings with no matching pairs, so I built a ship to use them.
The first draft
...a bit refined...
...and rendered:

Fast forward to 2008, when Jordan and Zach post a
cool
contest idea on Classic-Space.com. I also found some
inspirational artwork
that I thought would work well with a multi-winged design. Props to
nnenn for accent color inspiration,
Pete Reid for inspiring geebly engine,
and Matthew ‘ixlramp’ for the pentagonal construction technique. There are of
course a few of my own tricks added in there too, but I’ll save those for later.

C-S.com
flickr
Please let me know what you think!
--Bram
custom metal keychains
|
|
|

